I wanted to improve the condition of my eyelashes for a long time. They lacked in length and thickness, and their condition was highly questionable. Using an eyelash curler every day and applying false lashes did not improve their condition. I decided to test Nanolash Lash Lift Kit for myself and all of you!

Lash lamination at home – is it a rescue for weak eyelashes?
You already know that the condition of my eyelashes was questionable. That’s why I approached all the treatments recommended online carefully. I knew that one wrong move could cause my eyelashes to be even in worse shape.
I read a lot about the lash lamination treatment and decided it was one of the best solutions for me. With it, you can not only lengthen but also curl the eyelashes. You can also rebuild them and make them soft and shiny. This is what I was missing the most.
That’s when I came across Nanolash Lash Lift Kit online. I’ll be honest and admit that I was already familiar with this brand. I had read about it online many times, and most women spoke about it highly. Given that, I decided to give it a chance. I ordered Nanolash Lash Lift Kit the same day. The package arrived very quickly. Let’s give it a go!
What does the lash lift kit from Nanolash contain?

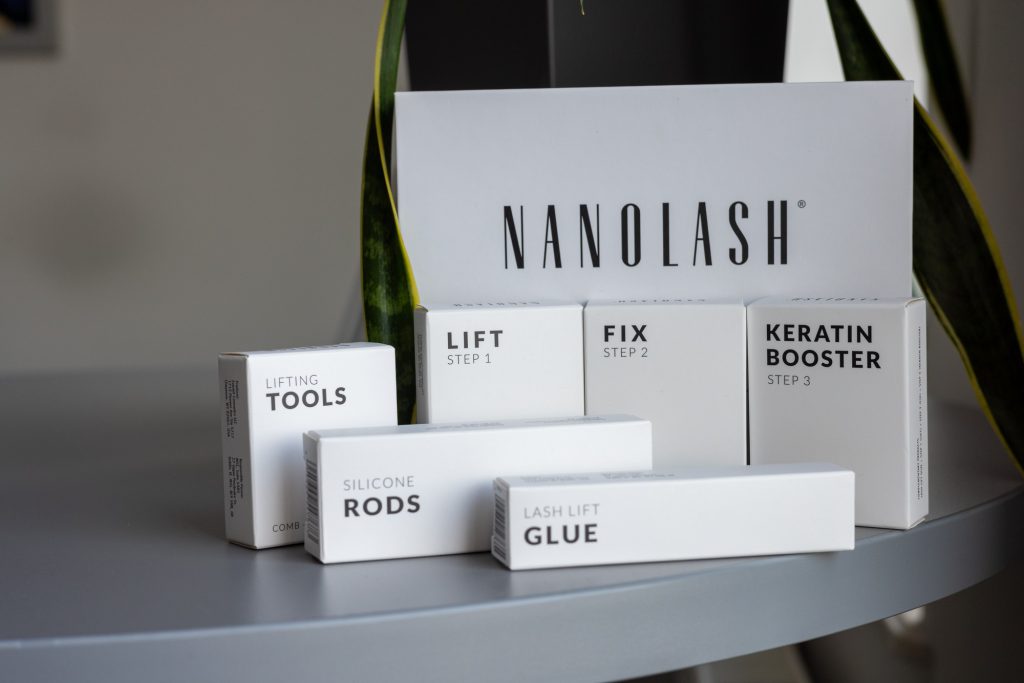
Laminating eyelashes at home has always seemed downright impossible to me. The moment I read about Nanolash Lash Lift Kit, everything seemed simple and logical. The kit is complete. In the box, I found:
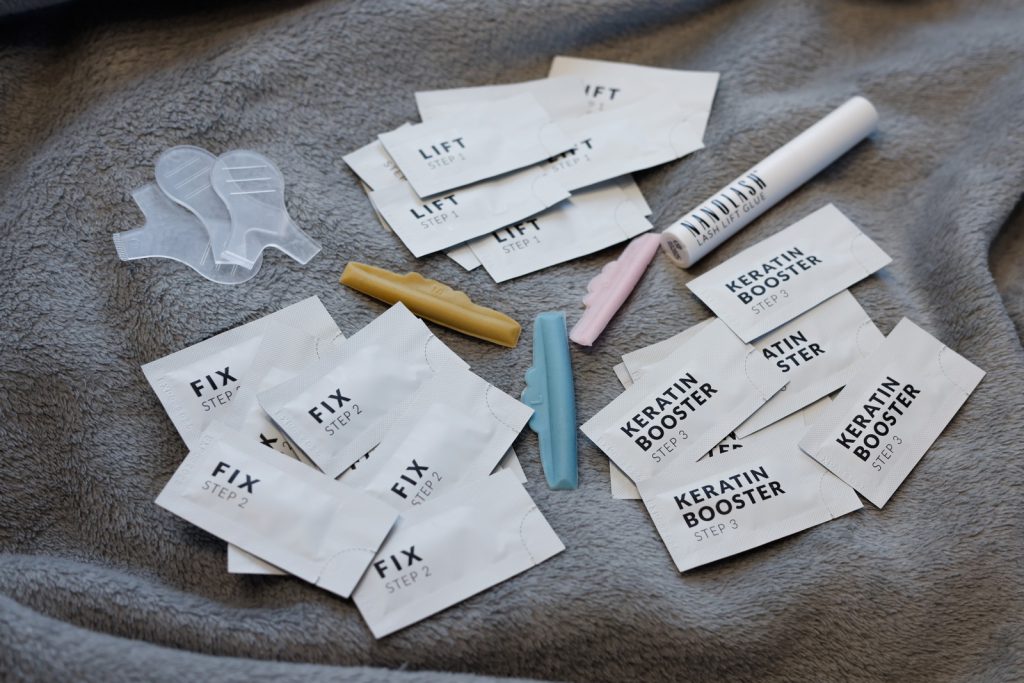
- 3 eyelash-laminating products: Lift – Step 1, Fix – Step 2 and Keratin Booster – Step 3;
- 3 pairs of silicone rods in 3 different sizes;
- Lash Lift Glue with a capacity of 5 milliliters;
- other accessories for performing lash lamination at home.
I will point out that the products are based on natural and safe ingredients. The label lists ingredients like coconut and avocado oil, for example. This made me believe that the restoration of my lashes could become a reality.
Another noteworthy fact is that this lash lamination kit comes with 30 sachets in total. Each one of them is 0.5 milliliters big. This means that with its help, you can perform an at-home eyelash lift as many as 10 times. Isn’t this an economical solution?
Was it easy to laminate my lashes at home?
I performed eyelash lamination at home for the first time in my life. I had never done it before, so my experience was non-existent. However, I read the instructions that came with the lift kit from Nanolash and followed them. First:
- I cleaned the lashes of any cosmetic residue and separated the top lashes from the bottom ones;
- I attached the rods in the chosen size as close to the lash line as possible;
- I applied the first product and left it on for 10 minutes, after which I washed it off thoroughly with an applicator;
- I applied the remaining products according to the correct order in exactly the same way.
After the specified time, I simply removed the rods.

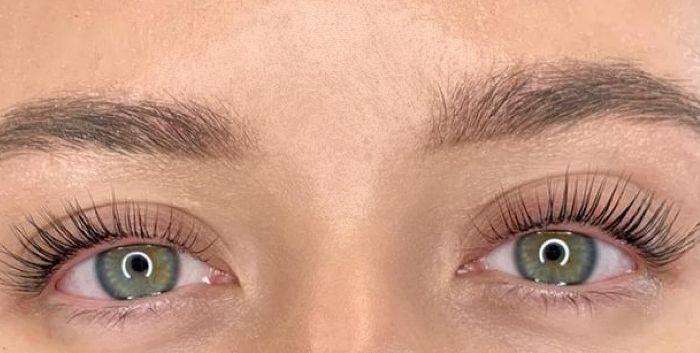
Girls! The effect was spectacular. My eyelashes became beautifully curled and looked longer and thicker. Their condition was also visibly improved. They were moisturized and felt soft to the touch. These were exactly the results I was expecting. Simply put, the lash lamination and lift kit from Nanolash did not disappoint me. What’s more, even though the initial condition of my eyelashes was not the best, the effects still lasted for 8 weeks!
Lash lamination – Nanolash Lash Lift Kit and my feedback
I owe you a summary. If I had to recommend one product for improving the condition of eyelashes, it would be the lash lift kit from Nanolash. Everything was exactly as the producer promised.
The lashes were visibly revived, became soft, and looked long and curled. As for me, there is no better product on the market, at least currently. See for yourself if Nanolash Lash Lift Kit can help you solve your lash problems!


